Connection String
The Connection String page allows user to
- manage the list of connections
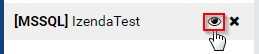
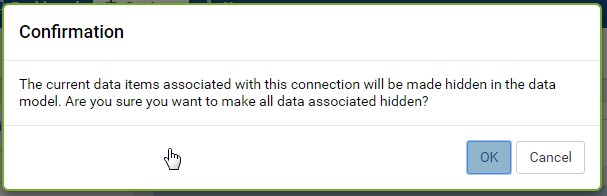
- select individual items from these connections to be visible in Data Model and Reports
Note
For the Reporting Databases:
- The connection string user should have permissions to read schema; to select on all tables, views, store procedures and functions that will be used as data sources; to execute those store procedures and functions.
- The user should also have permissions to create temp tables
Add connection and select visible data sources
In this step user adds a connection and selects data sources to be visible in reports.
Warning
Please use caution when adding stored procedures to the visible data source list. All stored procedures are executed when added to visible (input parameters are set to NULL) to obtain the resulting fields returned. Some stored procedures are created to do things like delete tables, add data to tables, etc. If these are added to the visible data sources, they will be executed in the database.
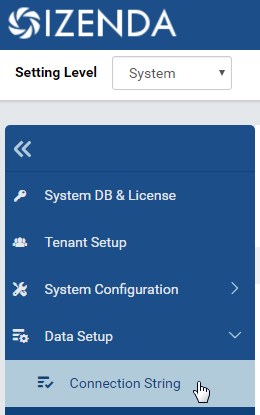
Fig. 48 Connection String Menu
In browser, log in to Izenda as a user with Connection String permission.
Click Settings, then Data Setup then Connection String in the left menu.
Select the Setting Level: either System or a specific tenant. (Fig. 48)
Click on Add Connection. (Fig. 49)

Fig. 49 Add Connection
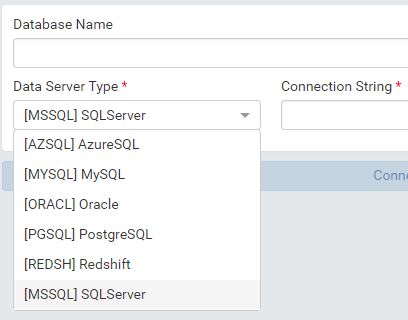
Fig. 50 Select Database Server Type
Select the database server type from the drop-down box. (Fig. 50)
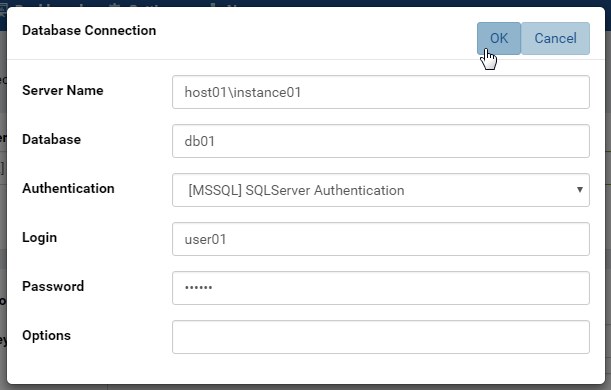
Fig. 51 Connection Builder tool
Click the Connection Builder icon (⚡) to help build the connection string easily. (Fig. 51)
This step can be bypassed when user already knows the connection string. In this case, it can be copied and pasted straight into the Connection String box. For examples of connection strings, please see the Connection String Examples section below.
Click the Test button to verify the connection string.
Note
- Unless the Connection String has been verified successfully, user will not be able to move next.
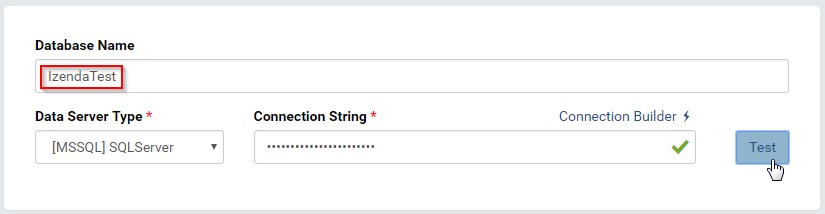
Fig. 52 Test the Connection and give it a name
The connection name will be automatically populated from the database name. User can edit to give it a more suitable name. (Fig. 52)
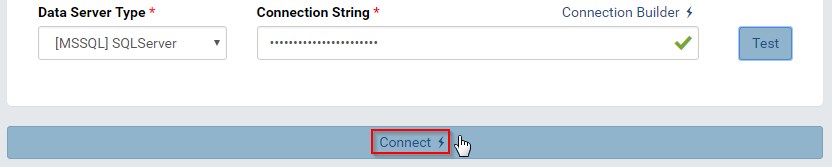
Fig. 53 Connect to the Connection
Click the Connect button to show the list of available data sources. (Fig. 53)
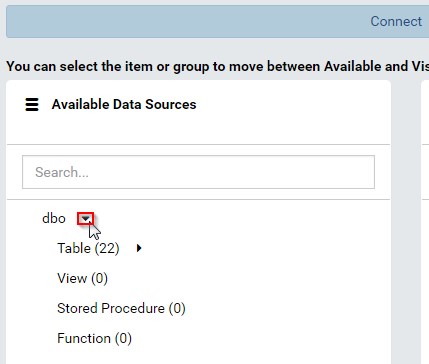
Fig. 54 Expand to see the data sources
Expand the listed user schemas and object types to see the data sources. (Fig. 54)
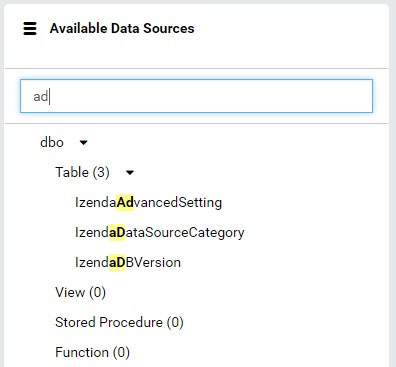
Fig. 55 Filter the data sources
The data sources can be quickly filtered by typing a partial name in the Search box. (Fig. 55)

Fig. 56 Move data sources between the two lists
Click on the data sources to move them between the two lists. (Fig. 56)
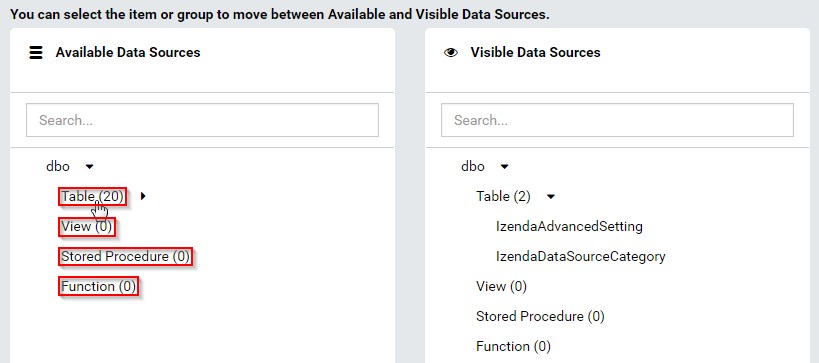
Fig. 57 Move a group of data sources
User can quickly move all data sources in a group (Table, View, Stored Procedure or Function) by clicking on that group name. (Fig. 57)
Click Save button at the top to save the connection and the visible data sources.
Connection Permissions
Izenda needs permissions to view the database schema and read from selected tables and views.
If using stored procedures as data source, Izenda needs execute permission on these stored procedures as well as create table and delete table permissions.
Note
The create table permission will be used to create temporary tables to store the output of stored procedures, for joining to other data sources. And the delete table permission will be used to clean up these temporary tables afterwards.
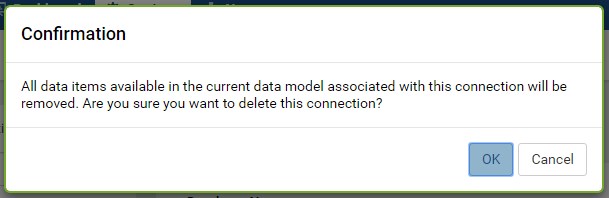
Delete connection
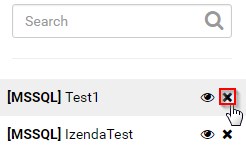

Refresh the list of available data sources
When there is a remote change in a connection, it will not be automatically reflected in Izenda. The Reconnect button needs to be manually clicked on to detect that.
Click on the connection.
Click the Reconnect button.

Fig. 64 Reconnect the connection
The remote changes in the data sources will be marked as either New data source or Changed data source.
The Data Setup, Connection String and Data Model menu items will also be marked with Changed data source icon (!). (Fig. 65)
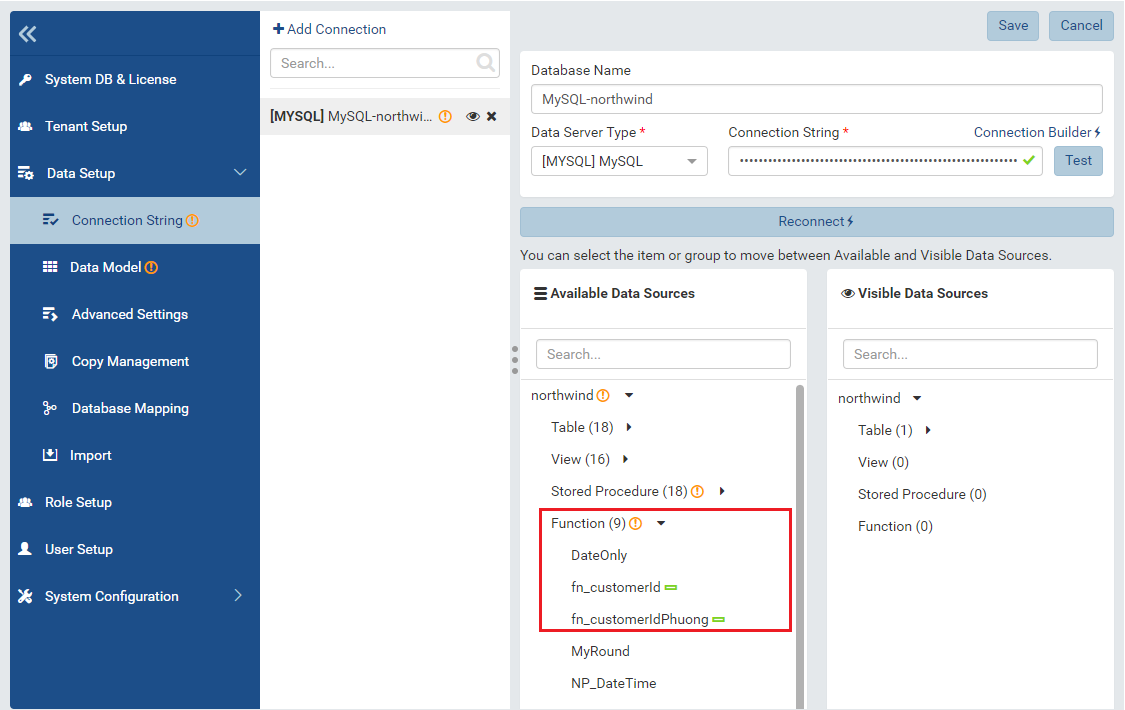
Fig. 65 New and Changed data sources
Go to Data Model page to resolve the changes.
Filter the connection list
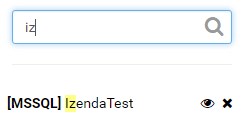
Fig. 66 Filter the connection list
The connection list can be quickly filtered by typing a partial connection name in the Search box. (Fig. 66)
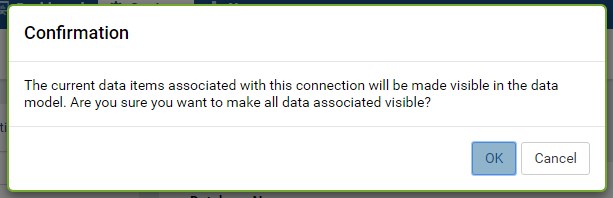
Cancel the changes
To cancel any changes without saving:
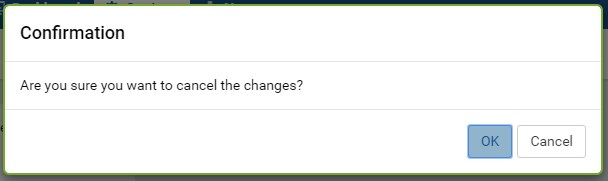
Fig. 67 Cancel confirmation pop-up
- Click the Cancel button at the top.
- Click OK in the confirmation pop-up. (Fig. 67)
Connection String Examples
- Oracle:
- Data Source=(DESCRIPTION=(ADDRESS=(PROTOCOL=TCP)(HOST=192.168.45.37)(PORT=1521))(CONNECT_DATA=(SERVICE_NAME=MyOracleSID)));User Id=user;Password=password;
- Data Source=(DESCRIPTION=(ADDRESS=(PROTOCOL=TCP)(HOST=192.168.45.37)(PORT=1521))(CONNECT_DATA=(SID=xe)));User Id=user;Password=password;
- Microsoft SQL Server:
- Server=192.168.45.37,1433;Database=testdatabase;User ID=user;Password=password
- Server=HOST-PC;Database=testdatabase;User ID=user;Password=password
- MySQL:
- Server=MY-PC;Port=3306;Database=testdatabase;User ID=user;Password=password
- PostgreSQL:
- Server=mydomainname;Port=5432;Database=testdatabase;User ID=user;Password=password
- Server=mydomainname;Port=5432;Database=testdatabase;User ID=user;Password=password;SslMode=Require;Trust Server Certificate=true;
Note
- If using Izenda v3.0.0 or greater and a PostgreSQL connection string with “SslMode=Require”, the “Trust Server Certificate=true;” parameter will also need to be added.
- Elasticsearch:
- server=https://xxxxxxxx.us-east-1.aws.found.io;Port=9243;User=user;Password=password;
- MongoDB:
- Server=localhost;Port=27017;Database=admin;User=user;Password=password;
- User=user;Password=password;Server=atlas-host1;Port=27017;Database=testdatabase;AuthDatabase=admin;AuthMechanism=SCRAM-SHA-1;ReplicaSet=cluster0-shard-00-01-u49p2.mongodb.net:27017,cluster0-shard-00-02-u49p2.mongodb.net:27017;UseSSL=true;SlaveOK=true;